http://earlsmann.co.uk/ - The website from where I brought the light panel.
Tuesday, 24 February 2009
Screen
I recieved the light panel that I will use for the screen section of the phone at the end of last week. I ordered it from the company Earlsman. For something so small it gives off an even bright light, however it requires 8 AA batteries to power it. I did want to keep all the electronics within the phone model itself, constructing it in a way that I could simply take the two faces apart from each other in order to access them. I would rather keep it self contained as I wanted the phone to be sat on a clear acrylic base, which I didn't want wires ruining the look of, and I also didn't want any holes in the phone where wires run out from. This may be difficult as the battery holder that is supplied is very thick and clumpy. I will need to mill out a lot of the internal part of the phone in order to make a space large enough for the battery pack to sit in.
Houston we have a problem...
I discovered that yesterday when I used the CNC machine to cut out certain details on the back of the phone I set the zero point too high on the machine's y axis. This means that everything the CNC cut out has ended up being about 8mm higher on the back phone face than it should be. I have started to rectify this problem by cutting a block of chemiwood at 8mm thick and attaching it to the top of the phone and filling in the space with car body filler. As I have already used the router to radius the edges I will have to re-do this part on the top half of the phone. This problem will set me back a day or so, however as not all projects go according to plan I think it is a good skill to learn to rectify them.
TIP: CNC a piece of material first and then cut out its profile so the zero point doesn't become quite so important.
TIP: CNC a piece of material first and then cut out its profile so the zero point doesn't become quite so important.
CNCing
This week I have managed to get on the CNC machine in order to cut out the pockets for my buttons, logo and screen to slot into. As this is the next biggest step to take in making my blocks of chemiwood look more like a phone I am pleased to have got this process underway, especially as I am halfway through the making time I have on this project. I found using the CNC machine quite straightforward, however the job that I was using it for was quite simple to begin with. I only now need to use the CNC machine in oreder to engrave lines on the aluminium disk button that sits in the centre of the phone.


Sunday, 15 February 2009
Laser Cutting the componants
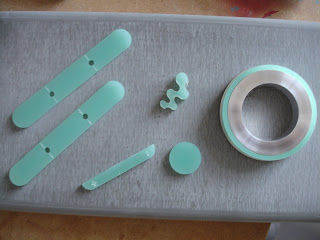
During this week I have used the laser cutter to create some of the small componants of the phone, such as the logo and buttons. I laser cut them from various thicknesses of acrylic and now I can progress with spraying some of them up to produce them as final pieces that I can separately glue into place when the body of the phone is ready.
Friday, 6 February 2009
Colour Samples
I have been looking at the finish of the phone and trying to plan ahead how I am going to make individual parts of it in advance in order to save time. Today I have been creating colour samples for the metallic blue camera section at the back of the phone.

I created the two samples above from first spraying a base coat of metallic silver cellulose paint. For the more blue sample on the left of the pic I sprayed over the silver with a coat of clear laquer mixed with a small amount of ultramarine blue. This was too blue so for the second sample I tinted the laquer with a small amount of blue and yellow to create a teal colour. To improve the samples I think the base silver colour needs to be more reflective, perhaps a chrome like colour would be better. I will also try to experiment with tint colours. At the moment by adding the opaque blue to the laquer there is not enough transparency to see the silver underneath. My tutor has suggested using a tint blue colour that itself is translucent rather than opaque.

I created the two samples above from first spraying a base coat of metallic silver cellulose paint. For the more blue sample on the left of the pic I sprayed over the silver with a coat of clear laquer mixed with a small amount of ultramarine blue. This was too blue so for the second sample I tinted the laquer with a small amount of blue and yellow to create a teal colour. To improve the samples I think the base silver colour needs to be more reflective, perhaps a chrome like colour would be better. I will also try to experiment with tint colours. At the moment by adding the opaque blue to the laquer there is not enough transparency to see the silver underneath. My tutor has suggested using a tint blue colour that itself is translucent rather than opaque.
Creating Curves!
This week as part of my work on the mobile phone model I have created the radius edges. This involved me using the router tool, which runs along the shape of the work curving the edge. I am feeling happier now with the progress of this project as slowly the two chunks of chemiwood I started off with are beginning to resemble the form of the phone.
Subscribe to:
Posts (Atom)


